Building your first react app is an amazing feeling for every code newbie, but hosting, and showcasing this project is a little bit difficult because it follows a different procedure than just pushing to GitHub, and hosting on your favorite cloud platform, but do not worry, I am here to guide on how to host your first react project, which can be showcased to friends, family, and even employers.
Now, let's get started.
These are the steps to be followed sequentially:
1
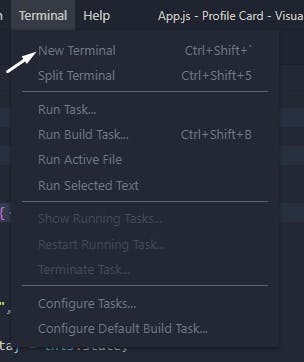
Open your react project folder, in your favorite text editor (I will be using VS code), and use this shortcut to open VScode terminal Ctrl + Shift + ` or simply click "Terminal", and select "New Terminal".

2
Once the terminal is open, you must type npm run build in the terminal.

npm run build creates a build directory with a production build of your app. Set up your favorite HTTP server so that a visitor to your site is served index.html, and requests to static paths like /static/js/main.
Here is the response you should get:
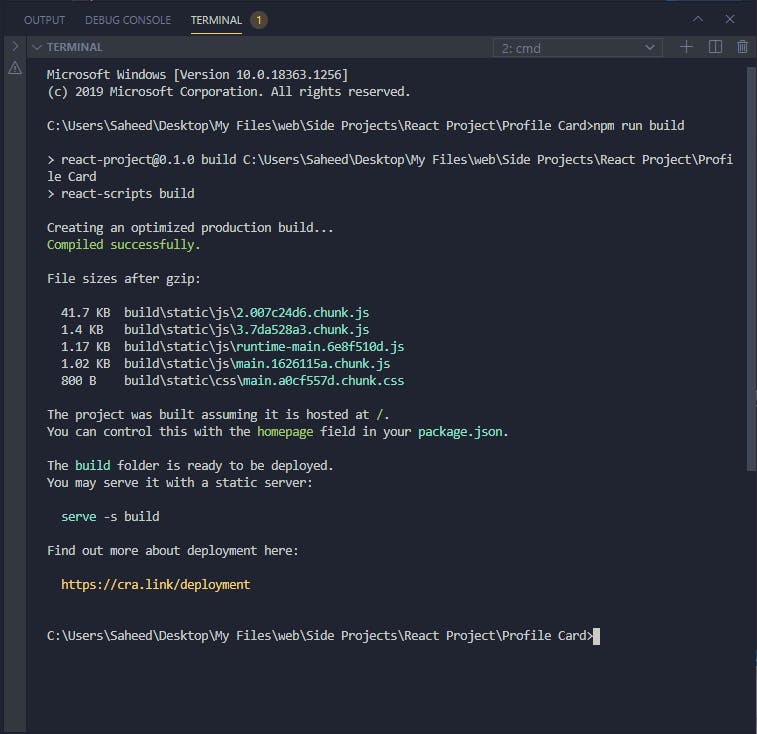
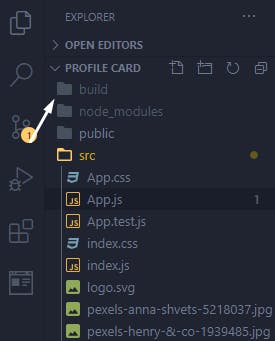
In your projects folder, you should notice, a new folder named "build" has added to your react project folder:
3
Now that you have this created, all you need to do is push to GitHub.
To push to GitHub, you need to create a new repository for your project, and run these commands in the VScode Terminal
git init
git add .
after running those commands copy this block of code from the newly created repo, and run it in the terminal:
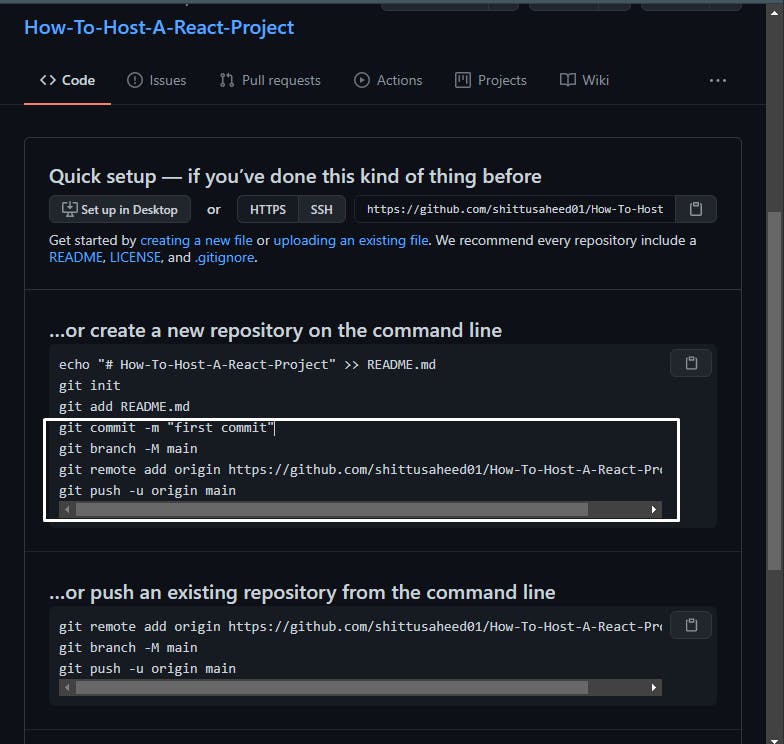
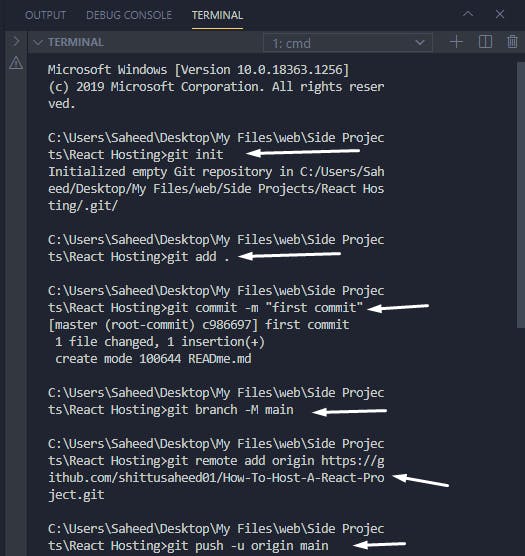
After running these commands, you should get this response in the terminal:
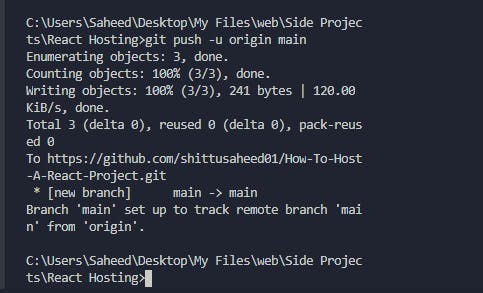
Refresh your GitHub page, and you should see that the file has now been added. You have successfully pushed your project to GitHub, what is left is hosting it.
4
To host your project, you need a cloud platform, but we will be using Vercel [vercel.com] in this guide.
Create a new Vercel account, and follow these steps:
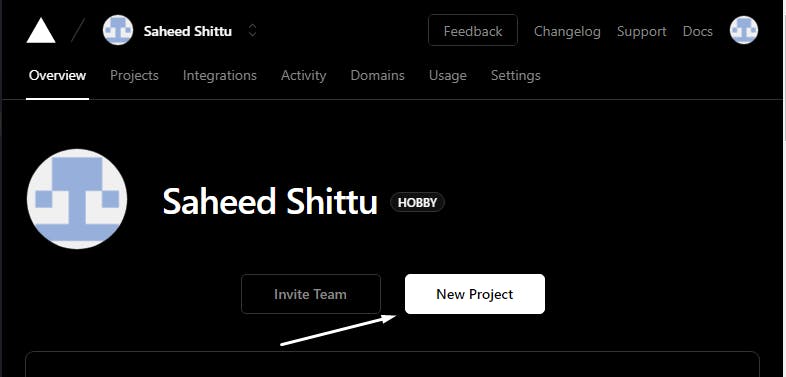
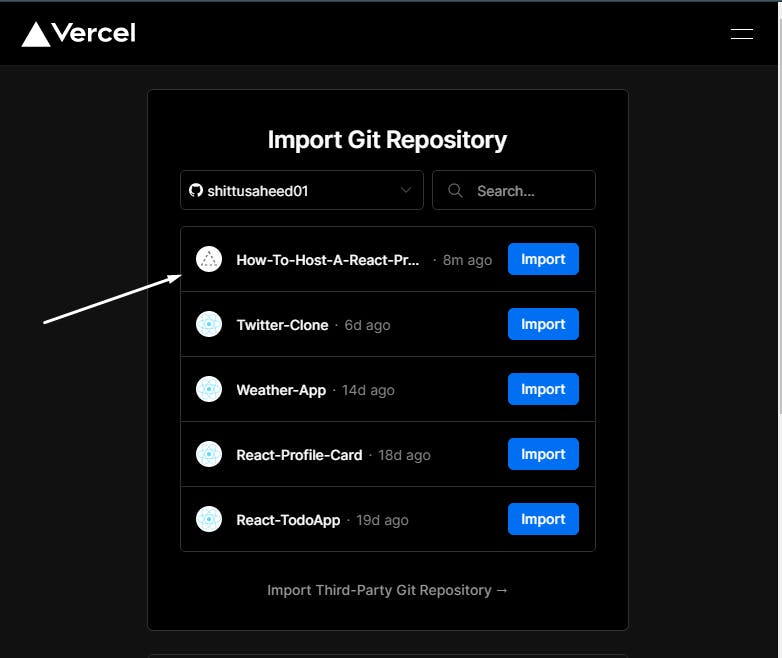
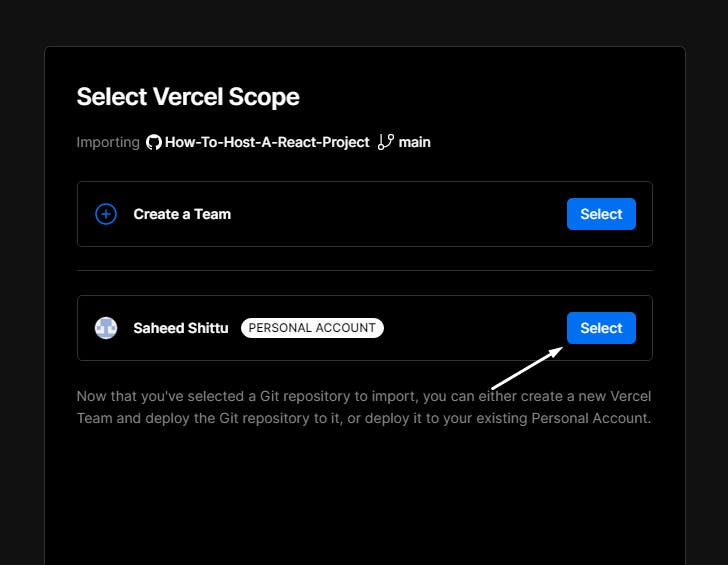
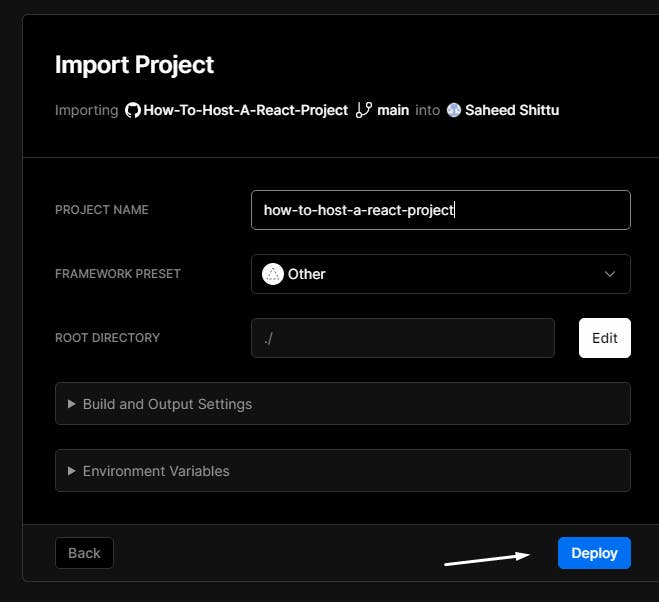
And finally, you have successfully hosted your first react project.
